be.dev
Web development blog by Philipp Rieber
Moving to the cloud part 6: Enabling RDS
In this part of my series we’ll get closer to the fundamentals of our application. In the last article we’ve outsourced our mail server to the cloud. Now we want to do the same with our database server to get rid of all the tasks that come with hosting a database server like setup, configuration, maintenance, backups, security, replication or updates. Amazon provides a really straightforward solution: RDS
Using Amazon RDS (Relational Database Service) is as simple as changing the database connection settings in our application’s parameters.yml to the ones provided in the AWS console.
# parameters.yml
parameters:
    # ...
    database_host: vv6m55fk5jgz8tg.gh4ruwxi8vb4.eu-west-1.rds.amazonaws.com
    database_port: ~
    database_name: database-name
    database_user: database-user
    database_password: VCXJAI9WEV9QZ2HL0BN9C
But how do we setup the database in RDS and how does Amazon handle all that stuff mentioned in the introduction?
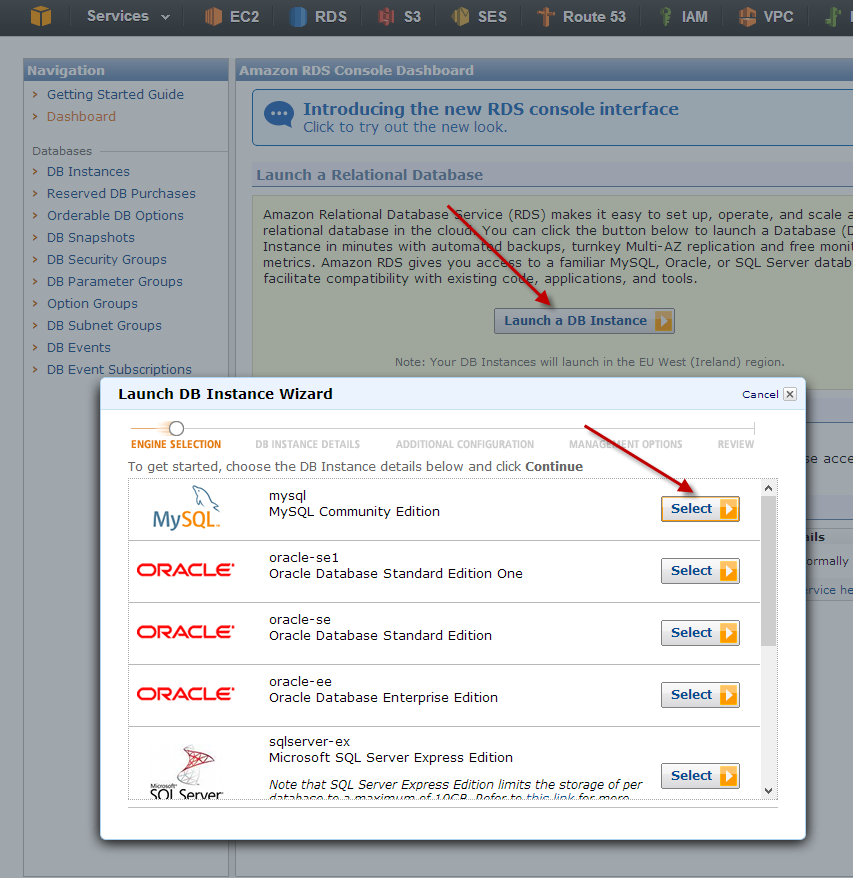
We just click on Launch a DB instance in the AWS console and choose our prefered database provider: MySQL
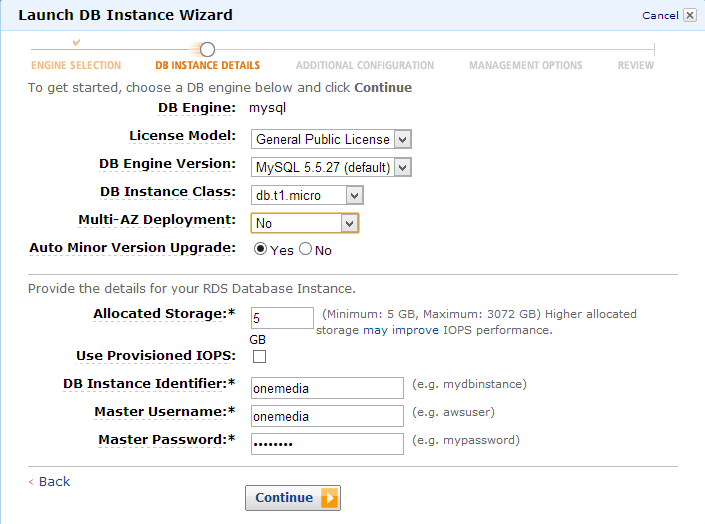
In the next dialog we choose from different options:
- MySQL version; in our example it’s the current GA release version 5.5
- Instance Class, defining the size of our database engine; in our example it’s the smallest and cheapest: Micro
- Multi-AZ Deployments would replicate our database instance in different availability zones providing enhanced availability in case of a failure. This is recommended for production environments
- Allow automatic minor version updates, e.g. from 5.5.27 to 5.5.28
- Choose identifier and credentials
This frees us from setting up the database server itself, from dealing with replication and from applying patch level updates every few weeks.
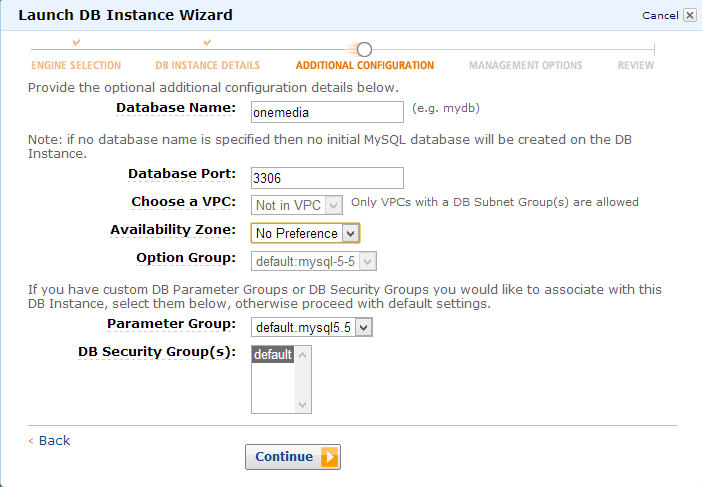
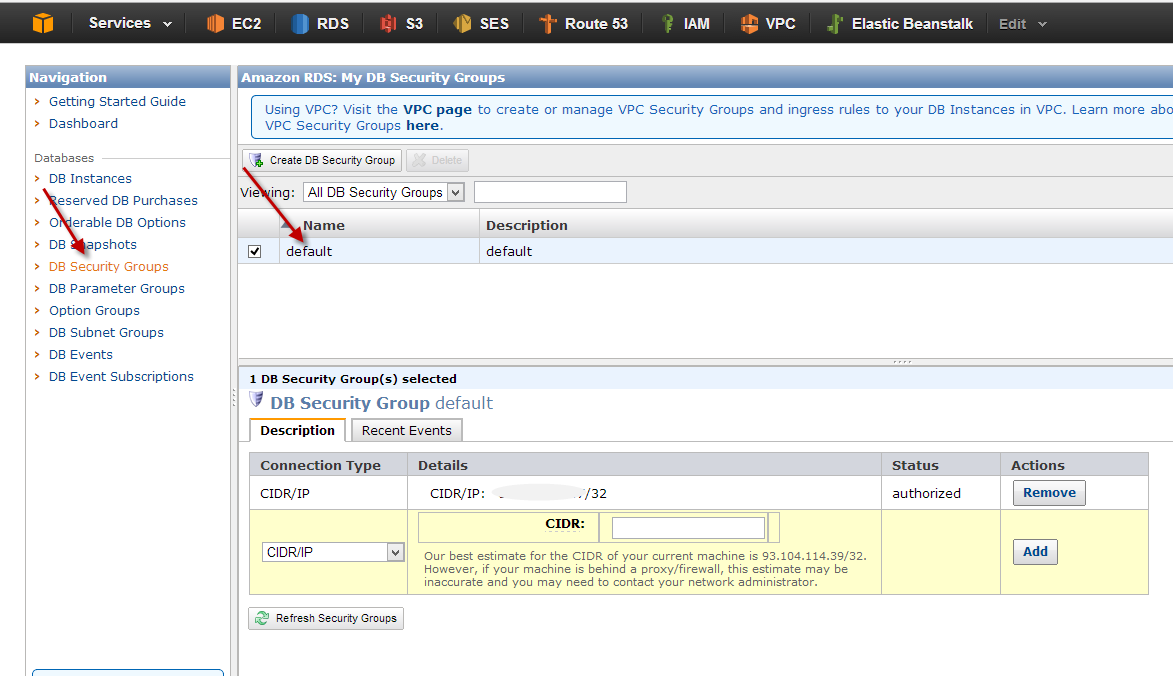
In the next step we can enter a database name and select a security group. Security groups are a fundamental concept in AWS and they let us create some kind of different firewalls by specifying what services are available under which ports and for which IP addresses or subnets. For instance, we can restrict RDS instance access to a specific EC2 instance or our company’s static IP address. Security groups have to be setup separately in the RDS console as shown on the second screenshot.
This frees us from digging to deep into security concerns.
In the next step we can define the backup retention period up to 35 days. RDS allows to restore the database to any second during the backup retention period (up to the last five minutes).
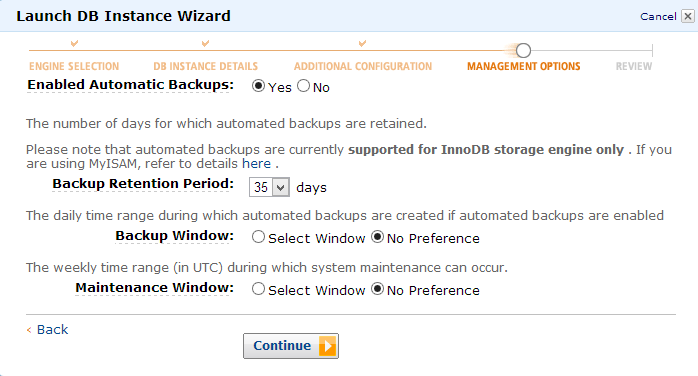
This frees us completely from setting up, maintaining and monitoring database backups.
In the last step we can verify all settings and then finally launch the database instance.
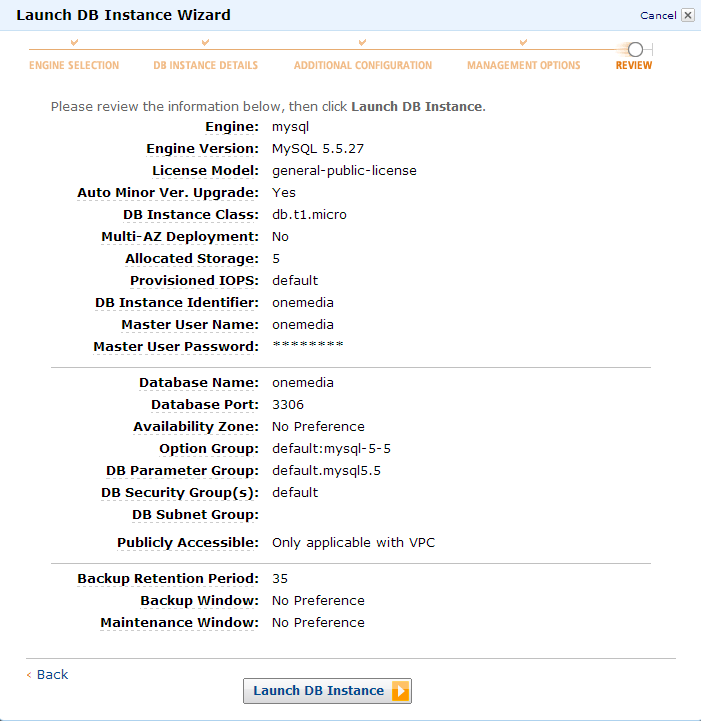
The new database instance will be available a few minutes later.

We then just need to copy the endpoint URL and the credentials chosen during the setup process to our parameters.yml and the application is ready to establish a connection to RDS.
Performance It is possible to use an RDS instance from outside the AWS ecosystem, for instance from your existing non-AWS server. This is very useful for testing or development purposes but you don’t want to do that in production. Connecting a database over the internet is just too slow. But as soon as our production move to EC2 or Elastic Beanstalk is complete we’ll also switch the database to RDS.
![]() Philipp Rieber is a passionate and certified PHP and Symfony developer
working at Paymill in Munich, Germany.
He is also engaged in the frontend, the Cloud, on Mobile, as a DevOp and a technical writer.
He is never missing the PHP User Group Munich
and he is co-organizing the Symfony User Group Munich.
Philipp Rieber is a passionate and certified PHP and Symfony developer
working at Paymill in Munich, Germany.
He is also engaged in the frontend, the Cloud, on Mobile, as a DevOp and a technical writer.
He is never missing the PHP User Group Munich
and he is co-organizing the Symfony User Group Munich.
Liked this post? Follow me on Twitter for updates.