be.dev
Web development blog by Philipp Rieber
Moving to the cloud part 7: Enabling Elastic Beanstalk
Finally, after preparing our application during the last few months bit by bit, it was time for the last and most important step: move the application code to an auto-scaling multi-server environment in the cloud and do a smooth DNS switch for the productive application. First we thought doing this with EC2 directly, but after some investigations we found solutions like Scalr, OpsWorks (the former Scalarium) or Elastic Beanstalk doing the heavy work for us. We decided in favor for Elastic Beanstalk - let’s see why and how.
The first time I played around with Amazon’s EC2 service some years ago I was completely excited about all the possibilities: Setting up server instances on demand by simple mouse clicks, choosing between different instance types regarding CPU and RAM size for the specific needs of an application, wiring several instances together with a load balancer in front - and only paying for what’s currently in use. Suddenly, even small companies became able to provide highly scalable multi-server environments without buying resources in advance. No financial risk if the application fails. No sysadmin that needs hours or days to configure fresh root servers. Easily extendable setup. No long running contracts. No setup fees.
Mostly, if you find a solution for an issue, you’ll get new issues when implementing this solution. Ok, with EC2 you can start whatever server instance type you need at any time. You can do this by a mouse click in the Amazon console or by programmatically using the API. You can create a load balancer and add instances to it. You can add more instances if the load grows, you can terminate instances as soon as you no longer need them. You can SSH onto any instance of your cluster and install packages, application code or cronjobs. This is really great - but you’ll want more for a productive application. You’ll want the scaling to be triggered automatically by the current load. You’ll want all instances to be configured the same. You’ll want to roll out new code to all instances in one go. You’ll want some cronjobs to be running only on one instance of the cluster that never gets terminated by autoscaling. You’ll want to have health checks and monitoring.
There are some services on the internet that help you with exactly this kind of issues. In other words, they help you manage your Amazon resources with an abstraction layer on top of the raw Amazon webservices. Those kind of abstraction layers are called Platform-as-a-Service (PaaS) - you get all the single services combined to the whole application platform. For instance, you can create named server farms in a nice browser GUI, configure the autoscaling triggers, deploy application code to all instances at once with no downtime etc. Some of them are third party services like Rightscale or Scalr. You’ll need to pay a service fee on top of the Amazon resources you’re managing with the service. But Amazon itself also provides two free services fo this purpose in the AWS console: OpsWork (formerly Scalarium) and Elastic Beanstalk. Scalarium was acquired by Amazon in the beginning of 2013 and is the foundation of OpsWorks. It makes heavy use of the configuration management software Chef and can therefore be highly customized. Elastic Beanstalk was the first Amazon PaaS and is less complex. It is using several Amazon webservices like EC2, Elastic Load Balancer (ELB), S3 and ties them together with a configuration made by the user.
OpsWorks will probably be the tool of choice for our next cloud migration. But when we started our migration it was freshly released and at first glance Chef cookbooks are not your best friends. So for this time, we put our trust in the fully established and well documented Elastic Beanstalk service which is free of charge.
In Elastic Beanstalk, you can host multiple applications. Each application allows you to have multiple environments, so you can for instance setup a Staging environment with only a single and cheap EC2 instance and an autoscaling Production environment using a powerful but expensive EC2 instance type.
Setup an Elastic Beanstalk application
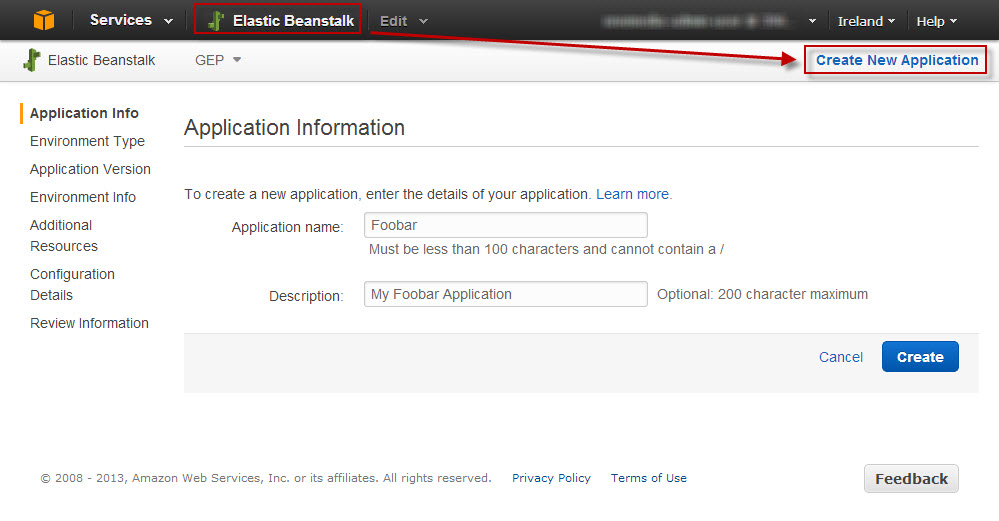
To create your first PaaS application, login to the Elastic Beanstalk console. At first, adjust the appropriate region for your needs, then click on Create New Application. Enter a name and description for your application:
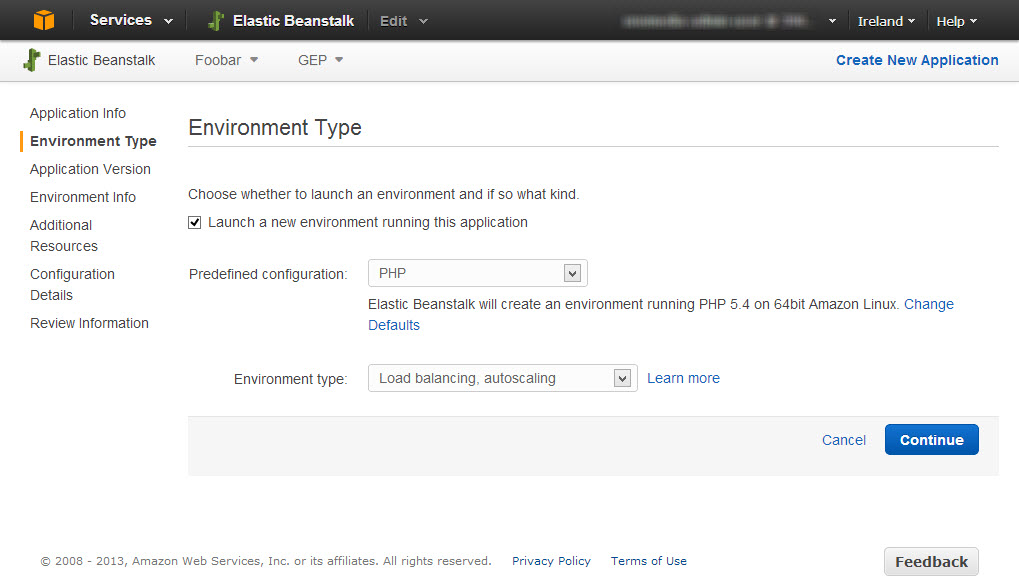
Then, step-by-step, you will be guided through the process to setup your first environment within your application. First, select your solution stack and if you wish an autoscaling environment. Actual triggers for autoscaling – like CPU or RAM usage – will be setup later.
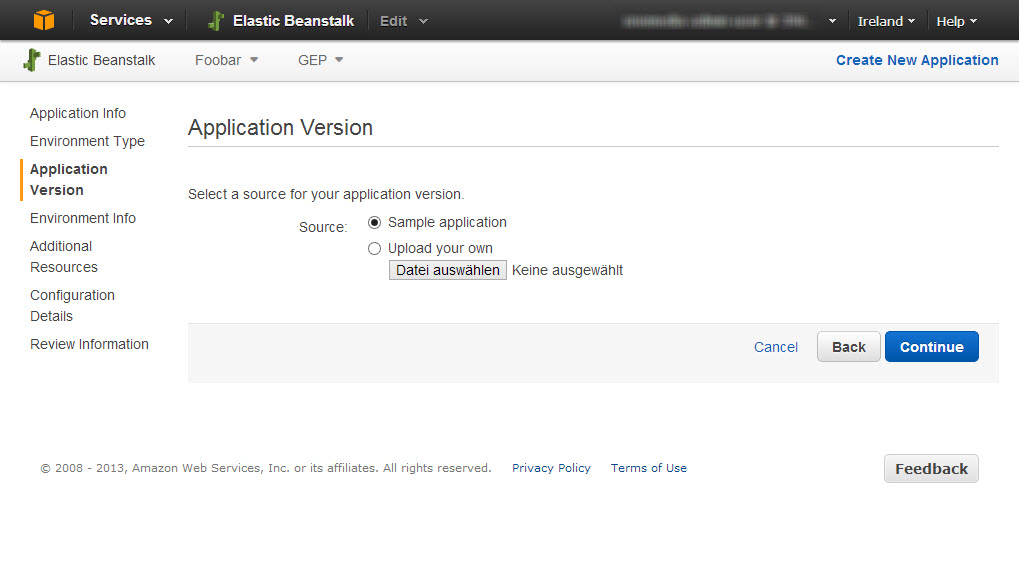
In the third step, you can upload your application code as a ZIP package or, in the first instance, opt for a sample application. We’ll go with the sample application and install a custom application later on:
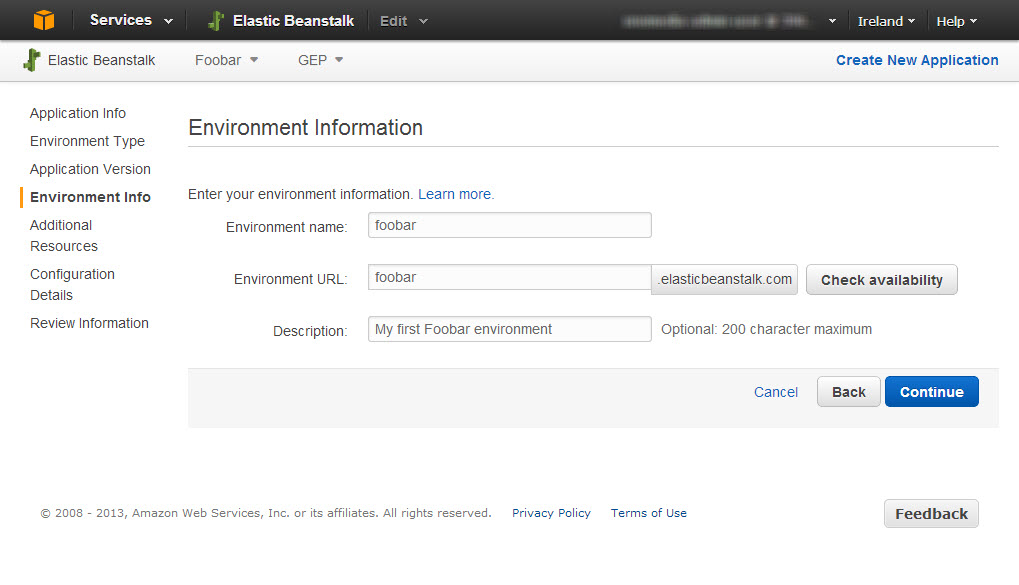
Provide some info for your environment name, an unique elasticbeanstalk.com sub domain, e.g. foobar.elasticbeanstalk.com, and a description. Please note that your real application URL is fully customizable using Amazon Route53.
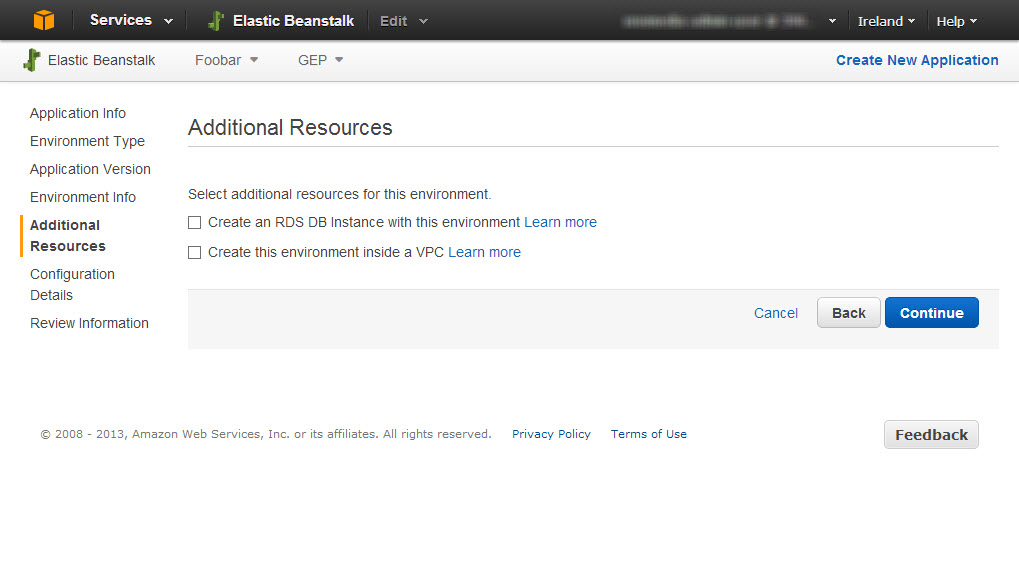
We don’t need any additional resources at this point, so let’s just skip the next step. Regarding the RDS instance, it’s even more convenient to do the setup manually.
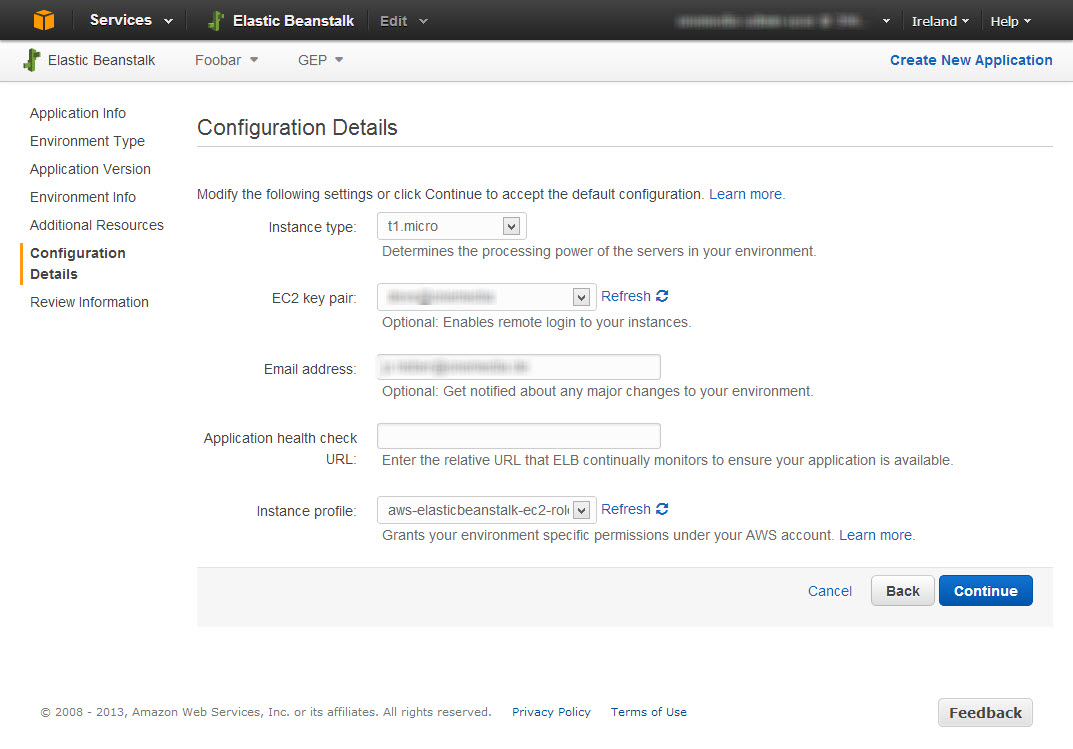
In the configuration details, you can specify the EC2 instance type for your environment. Please note: check out the pricing before selecting an instance type. Powerful instance types can get real expensive, so you should go with a micro instance first. Besides, give an EC2 keypair so you can SSH into the managed EC2 machines and an email address for status notifications. You can also specify a health check URL within your application which will is pinged every few minutes to check if your application is still alive.
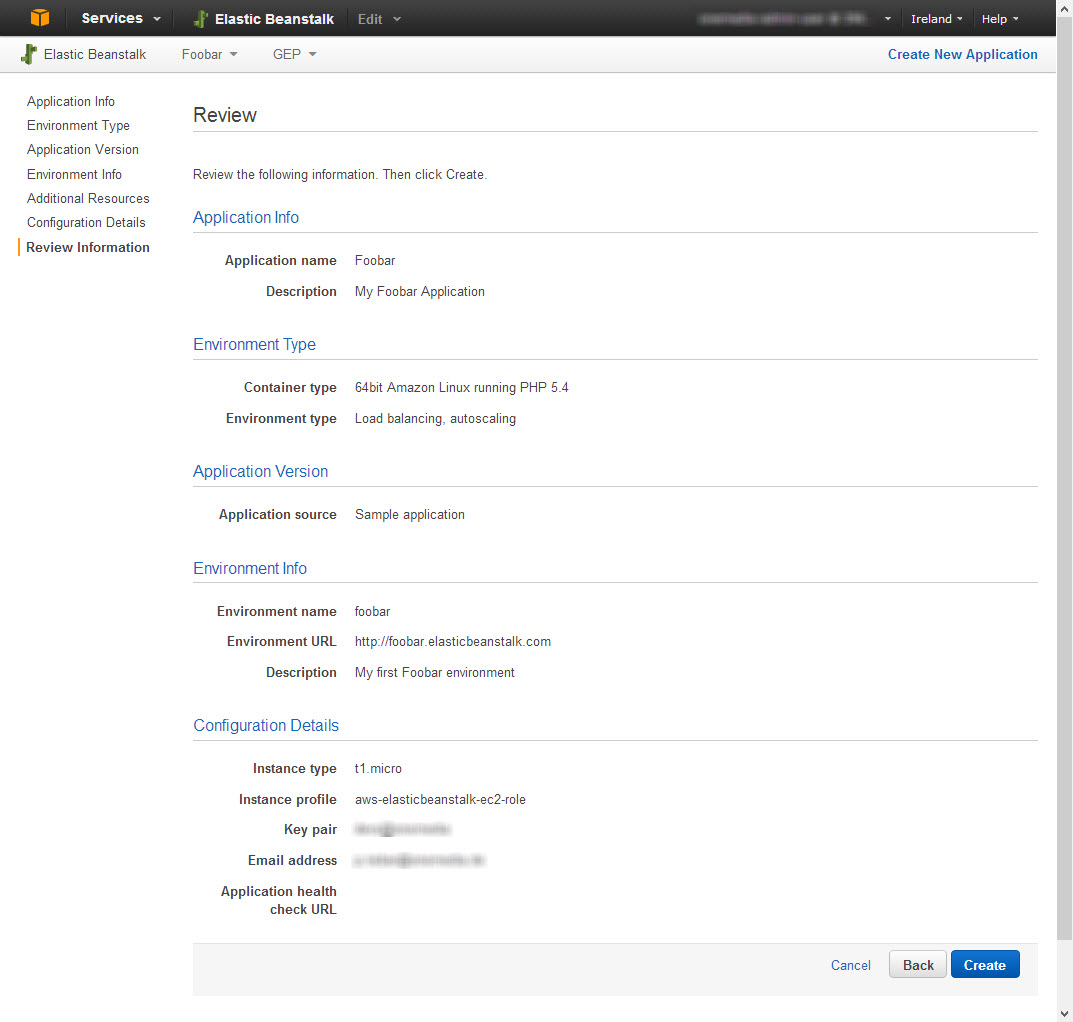
Review all information and finally Create your platform:
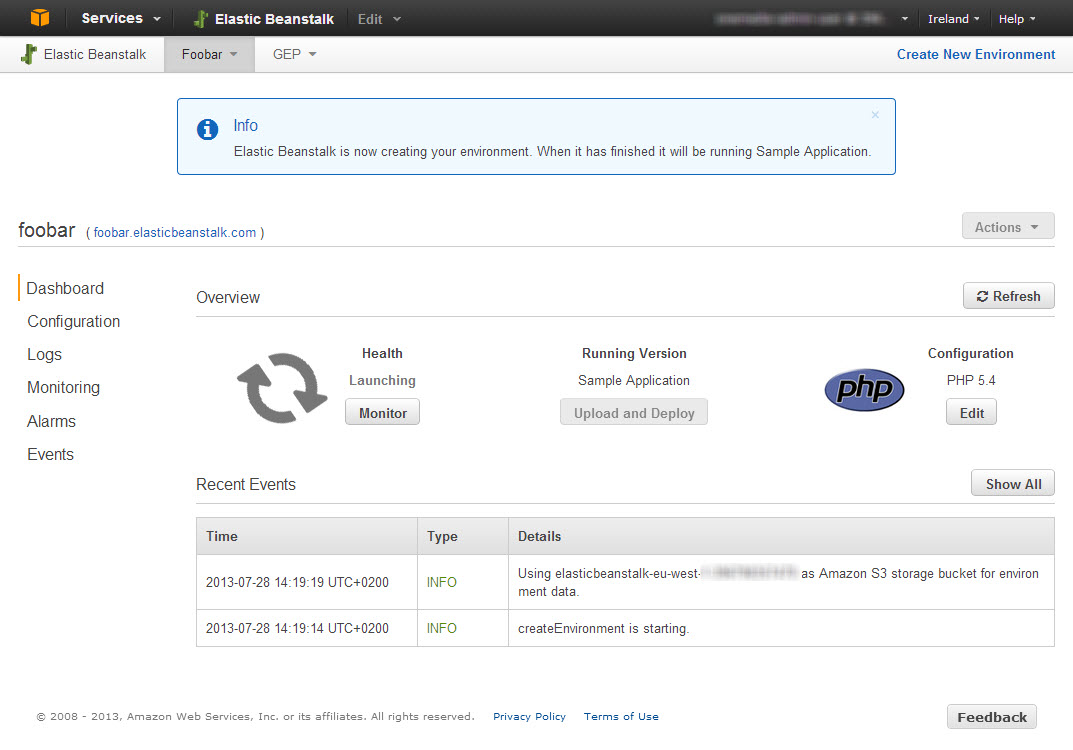
You can follow the launch process of your first application environment by looking at the events log. This may take some time to complete.
After the creation process has completed you’ll see a green checkmark for the health status …
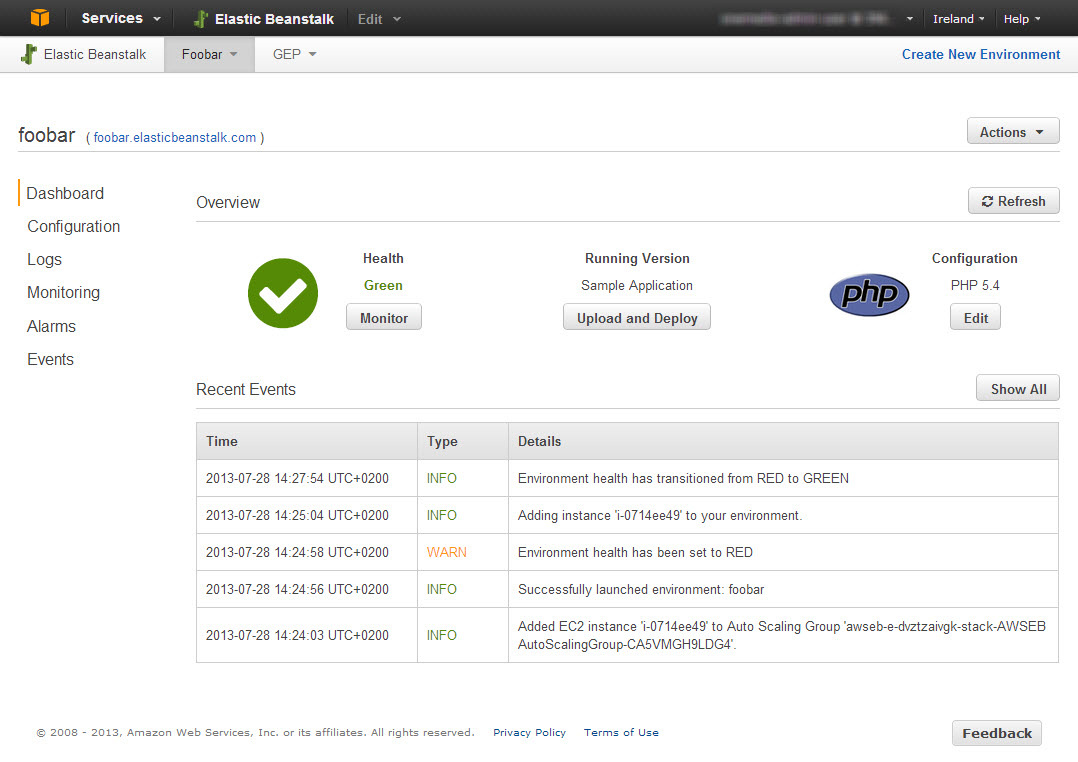
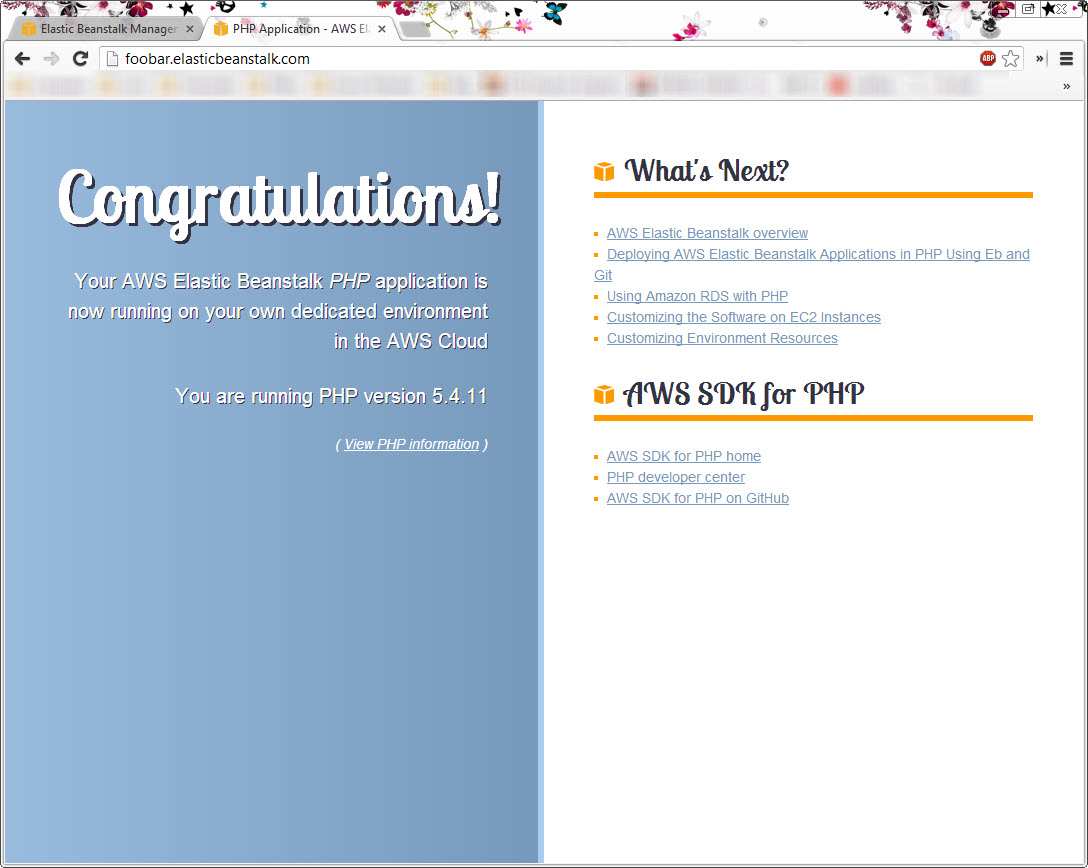
… and you’re able to access the sample application by the elasticbeanstalk.com sub domain you specified before, e.g. http://foobar.elasticbeanstalk.com.
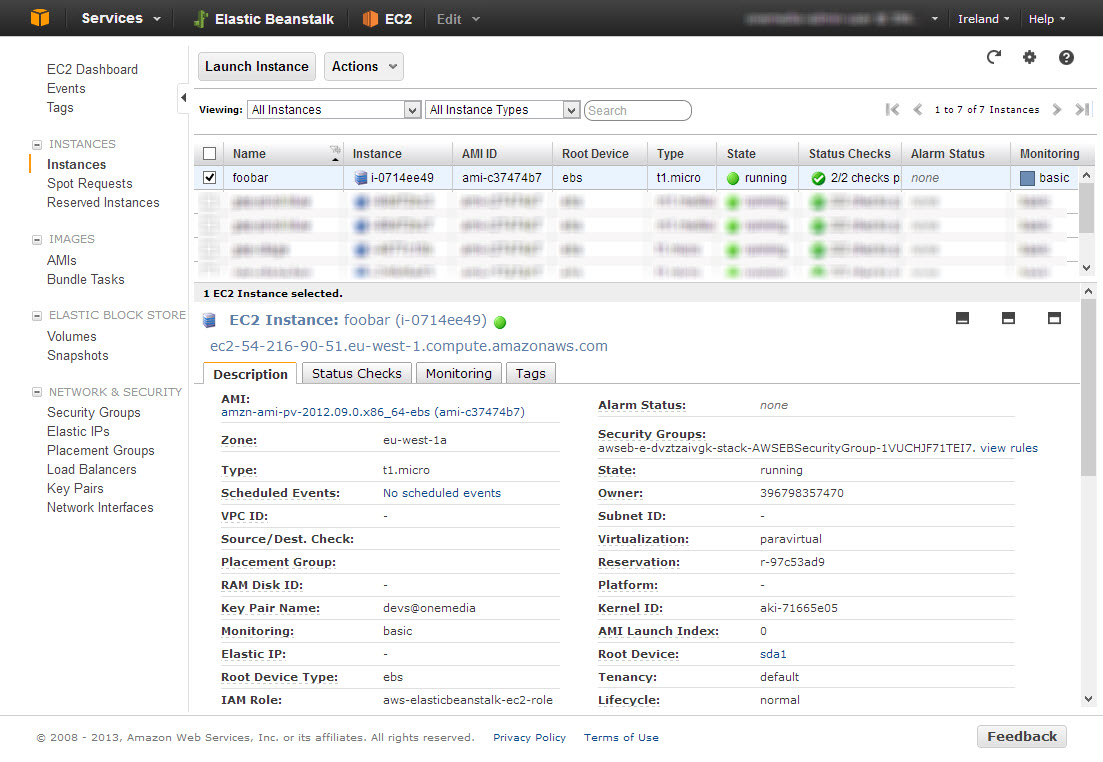
The EC2 console now contains EC2 instances for your new Elastic Beanstalk environment:
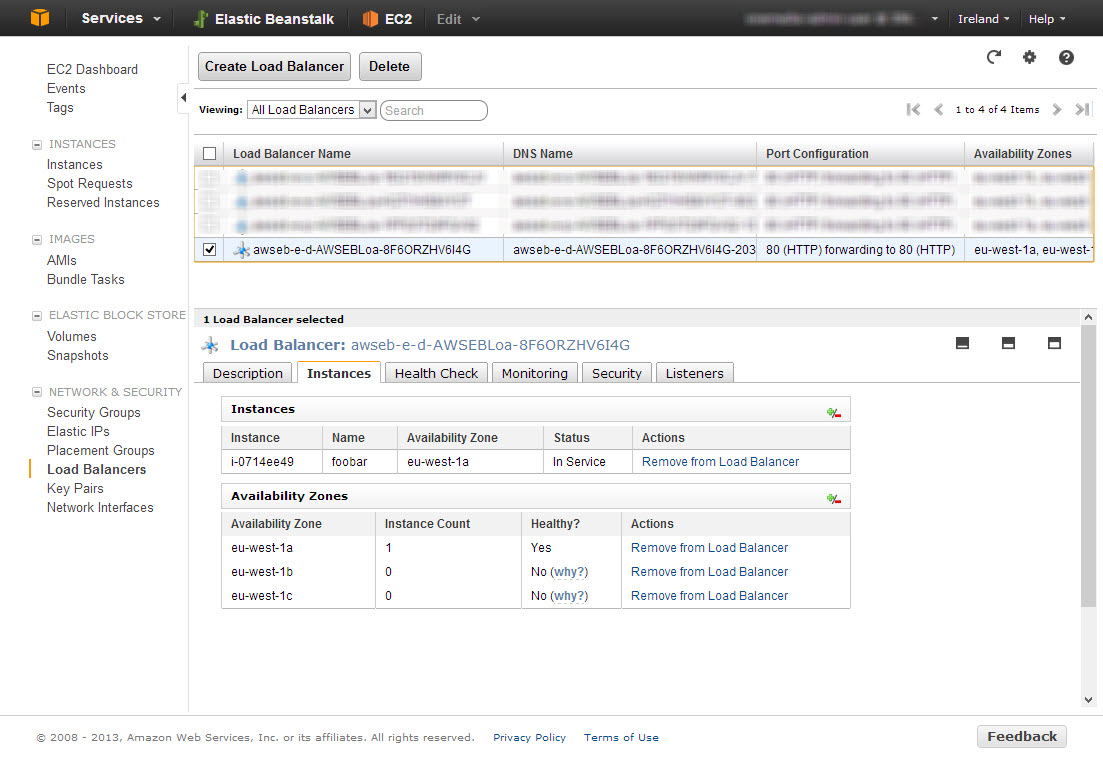
A load balancer has been set up automatically in front of your EC2 instance(s):
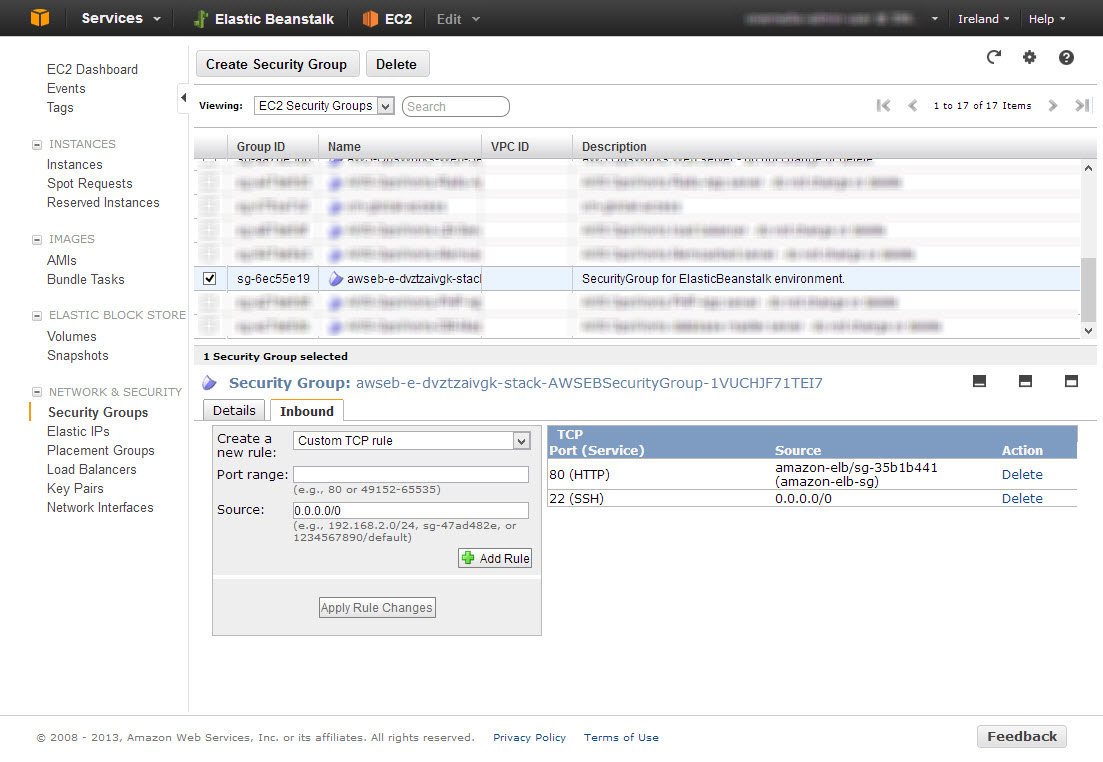
And there’s also a new security group for your new environment, allowing access to the web server on port 80 and via SSH on port 22:
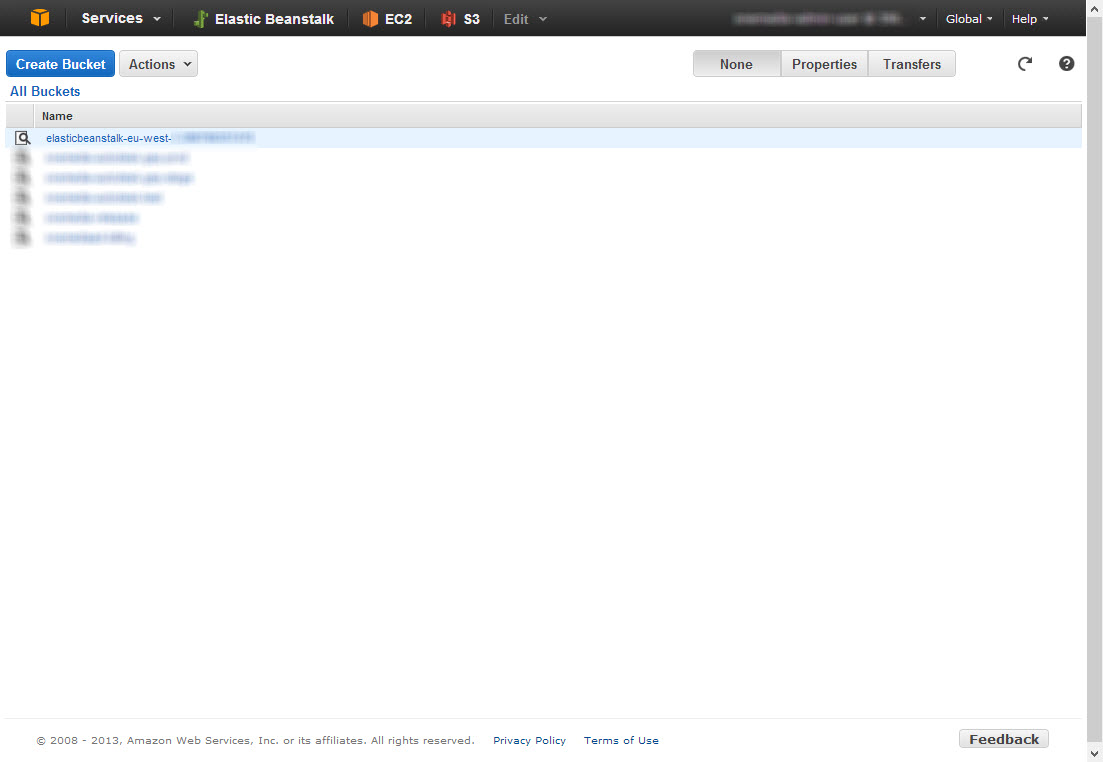
Looking at your S3 console, you’ll notice a fresh S3 bucket related to your Elastic Beanstalk environment. This is were new release versions of your application code get stored, so they can be deployed and also be roll-backed easily.
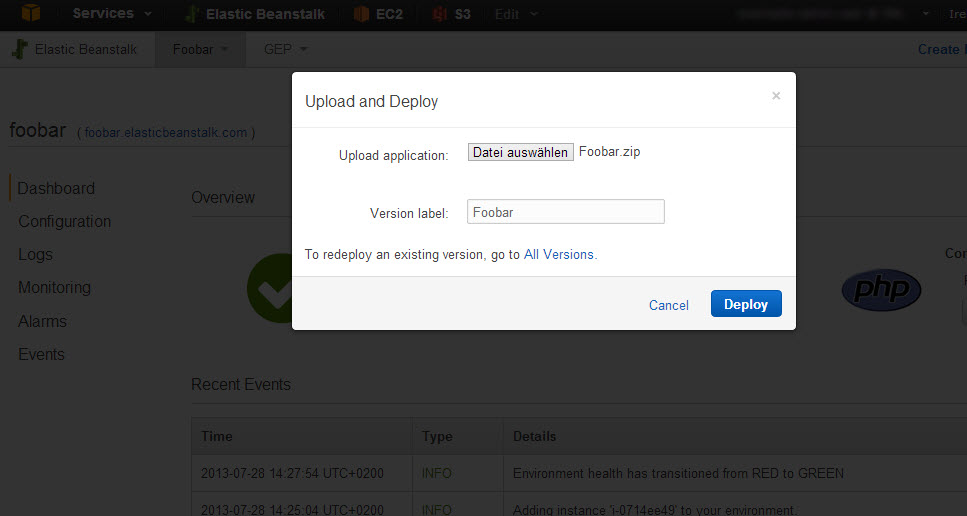
To deploy a custom application, go back to the dashboard of your Elastic Beanstalk environment and upload a ZIP package of your application code by clicking on Upload and Deploy:
Again, you can follow the environment update by looking at the Recent Events:
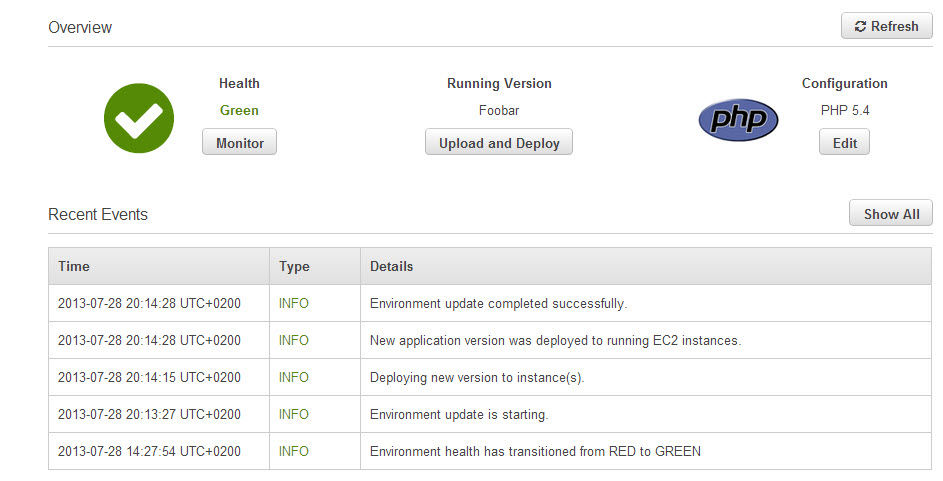
As soon as the deployment is complete you should be able to access your application by entering the chosen sub domain in your browser, e.g. http://foobar.elasticbeanstalk.com.
What actually happens during deployment is that a ZIP archive of your whole application is uploaded to a dedicated S3 bucket first. Then a so-called Application Version is created from your upload and a deployment to the Elastic Beanstalk gets triggered. No matter how many servers are currently running behind the load balancer in your environment, Elastic Beanstalk takes care of the roll-out to all of them and switching everything live in the end.
Customizing
If your application has specific server requirements like additional software packages, a different document root, specific PHP settings or if you want to add custom files (e.g. containing specific parameters for your database connection), it is possible to include an /.ebextensions directory in your zipped application code. All files using the extension *.config in this directory can be used to specify custom configuration. For instance, if you need the lynx package installed, an .htaccess secured area, a custom parameters.yml in a Symfony project, some custom php.ini settings, a cron job to send out what’s in the Swiftmailer file spool and set an appropriate timezone for the EC2 instances, you may use a configuration file /.ebextensions/app.config containing this:
packages:
  yum:
    lynx: []

files:
  "/tmp/htaccess":
    mode: "644"
    owner: webapp
    group: webapp
    content: |
      AuthName "My secured area"
      AuthType Basic
      AuthUserFile /var/app/current/.htpasswd
      require user admin
  "/tmp/parameters.yml":
    mode: "644"
    owner: webapp
    group: webapp
    content: |
      parameters:
        database_driver: pdo_mysql
        database_host: omdb.vnbnlwvfvi3zc.eu-west-1.rds.amazonaws.com
        database_port: ~
        database_name: app
        database_user: app
        database_password: JKIAJ97WSC3L9GFZS7P2
  "/etc/php.d/app.ini":
    mode: "644"
    content: |
      date.timezone = Europe/Berlin
  "/tmp/app-crons":
    mode: "644"
    content: |
      MAILTO=cron@app.com
      * * * * * webapp /var/app/current/app/console swiftmailer:spool:send --env=stage > /dev/null 2>&1

commands:
  10_servertime:
    command: cp /usr/share/zoneinfo/Europe/Berlin /etc/localtime && echo 'ZONE="Europe/Berlin"' | tee /etc/sysconfig/clock

container_commands:
  10_parameters:
    command: mv /tmp/parameters.yml app/config/
  20_protection:
    command: 'mv /tmp/htaccess .htaccess && htpasswd -cb .htpasswd admin "B0DEK/TK2k_p0FgPxK1" && chmod 444 .htpasswd'
  30_crons:
    command: mv /tmp/app-crons /etc/cron.d/
There’s lot of documentation how you can customize to your specific needs and how to execute custom commands during the deployment process.
Setup a deployment script
Since all Amazon web services can be managed by powerful APIs, you can also do a deployment by wiring together some CLI commands in a shell script and by using the AWS Command Line Tools (which give you the aws command):
# Application name on Elastic Beanstalk
APP="foobar"
# Environment name on Elastic Beanstalk
ENV="staging"
# S3 bucket name of Elastic Beanstalk application
BUCKET="elasticbeanstalk-eu-west-1-294798127440"

# Create a unique version string for this release
VERSION="$ENV-v_`date +%Y-%m-%d_%H-%M-%S`"
# Zip the application
zip -r $VERSION.zip /path/to/your/application

# Push zipped application to S3 - this may take a while
aws --profile $APP s3 cp $VERSION.zip s3://$BUCKET/$VERSION.zip
# Create application version
aws --profile $APP elasticbeanstalk create-application-version --application-name $APP --version-label $VERSION --source-bundle S3Bucket=$BUCKET,S3Key=$VERSION.zip
# Trigger environment update
aws --profile $APP elasticbeanstalk update-environment --environment-name $ENV --version-label $VERSION
The remaining question here is how to prepare the application code that gets zipped so that it can run properly and secure on the Elastic Beanstalk environment. You may need to setup a custom process here, e.g. to get rid of unnecessary files like development front controllers or uncompressed asset files. You can do this by by extending the shell script or by using build tools like Ant or Phing. In the end, what you need to build, is a directory with your application code completely stripped down to the bare minimum of what’s really needed to run the application, maybe compressed assets and likely you need to include a configuration file appropriate for your target environment (database settings, API keys etc. for this specific environment). For the latter, you may also the custom configuration file feature shown above or environment variables. On Elastic Beanstalk, you can set environment variables easily in the environment configuration and they are available on every EC2 instance managed by your environment.
One thing to note is that in a PHP application that uses Composer, you do not have to include your /vendor directory. Elastic Beanstalk makes some assumption about your application, and if there’s a composer.json in your application root, it automatically does a composer install during deployment. This will save you a lot of time and bandwidth when transmitting your zipped application code.
Autoscaling
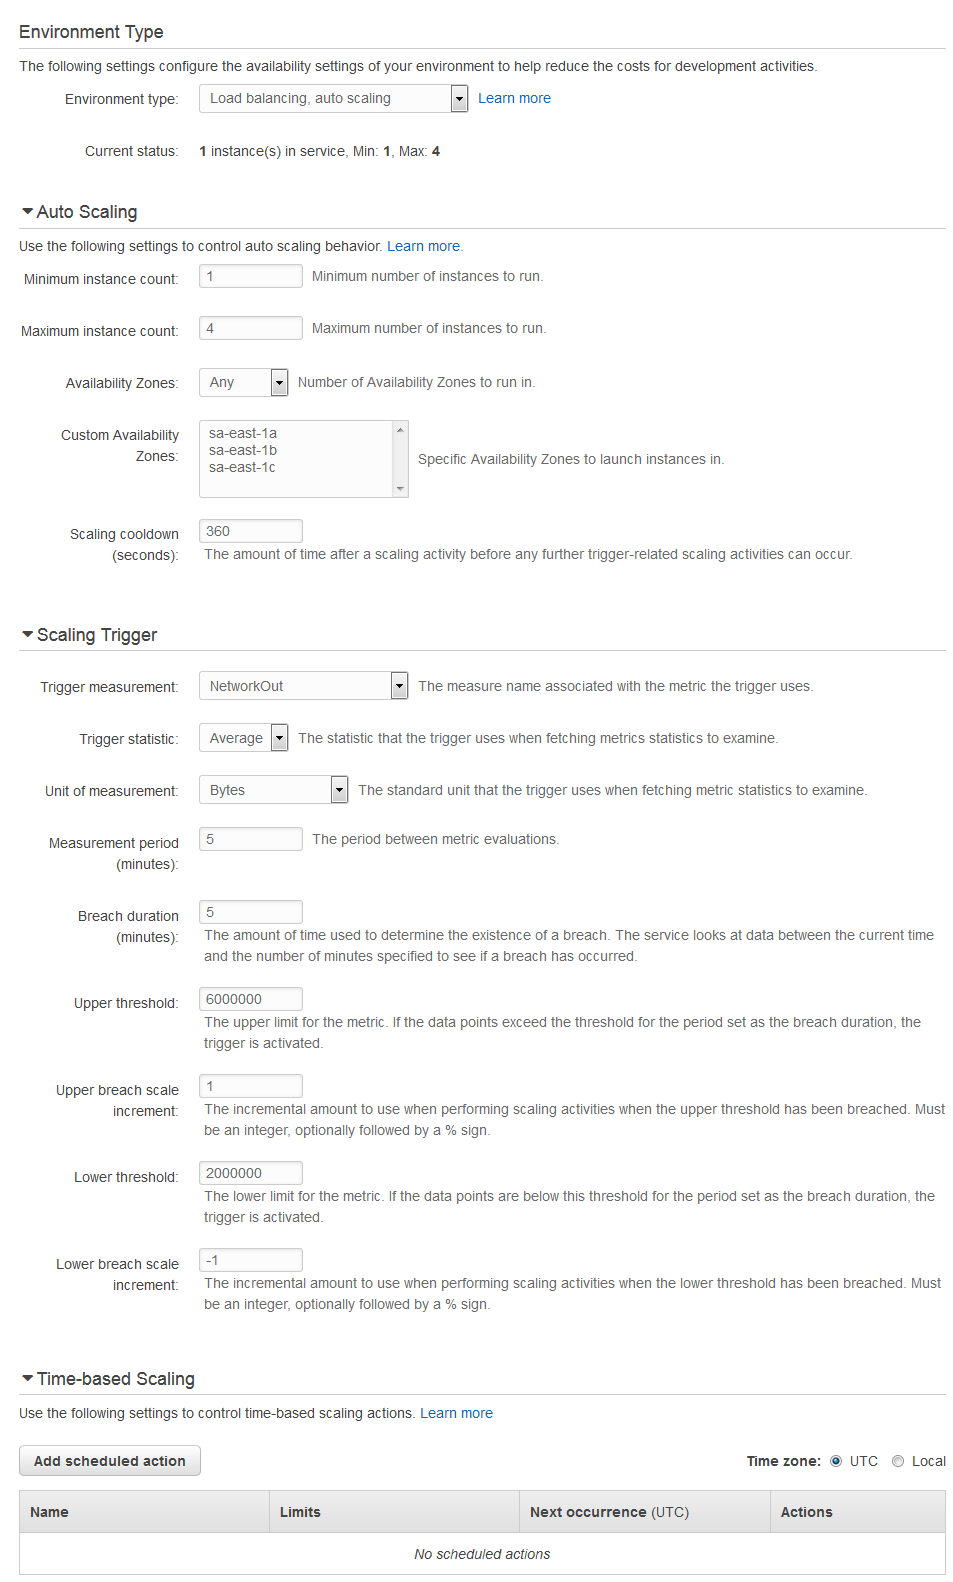
Finally, to enable autoscaling, go to the Configuration page of your Elastic Beanstalk environment and enter a range of servers you’ll want your application to run on. For instance, you may want of minimum of 2 servers to be on the safe side, and a maximum of 4 to absorb peak loads. You can even setup a timetable for autoscaling – e.g. to prepare for your TV commercials – and also spread the EC2 instances across Availability Zones to be independent from regional outages etc.
More
There are a way more features available on Elastic Beanstalk than be covered in this article. You can do for example far more customizations, there are special options for all the different platform stacks, zero-downtime deployments, SSL, usage of custom domains, integration of other AWS services etc. Just check out the extensive documentation for more information.
![]() Philipp Rieber is a passionate and certified PHP and Symfony developer
working at Paymill in Munich, Germany.
He is also engaged in the frontend, the Cloud, on Mobile, as a DevOp and a technical writer.
He is never missing the PHP User Group Munich
and he is co-organizing the Symfony User Group Munich.
Philipp Rieber is a passionate and certified PHP and Symfony developer
working at Paymill in Munich, Germany.
He is also engaged in the frontend, the Cloud, on Mobile, as a DevOp and a technical writer.
He is never missing the PHP User Group Munich
and he is co-organizing the Symfony User Group Munich.
Liked this post? Follow me on Twitter for updates.